
Fixing a Broken Scroll Wheel – Corsair Scimitar Pro RGB
If you have a Corsair mouse with this type of scroll wheel and it’s broken, and you have access to an SLA printer, I’ve uploaded the .STL to Printables and MyMiniFactory. Download links are near the end of this article!
Update: If your scroll wheel shaft isn’t broken, but scrolling jumps around or misses certain notches, then your scroll wheel encoder may be wearing out. This has happened to both of my Scimitar mice (jeez…), however I was able to repair them with replacement encoders, which are relatively easy to find. I can’t recall if the Scimitar uses a 7 or 9mm sized encoder switch (I’m 85% sure it’s 9mm), but the hex shaft is the standard 1.5mm. When in doubt, a variety pack like this should certainly include the correct size.
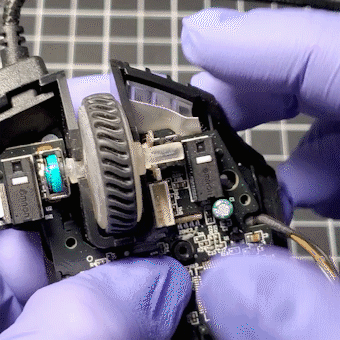
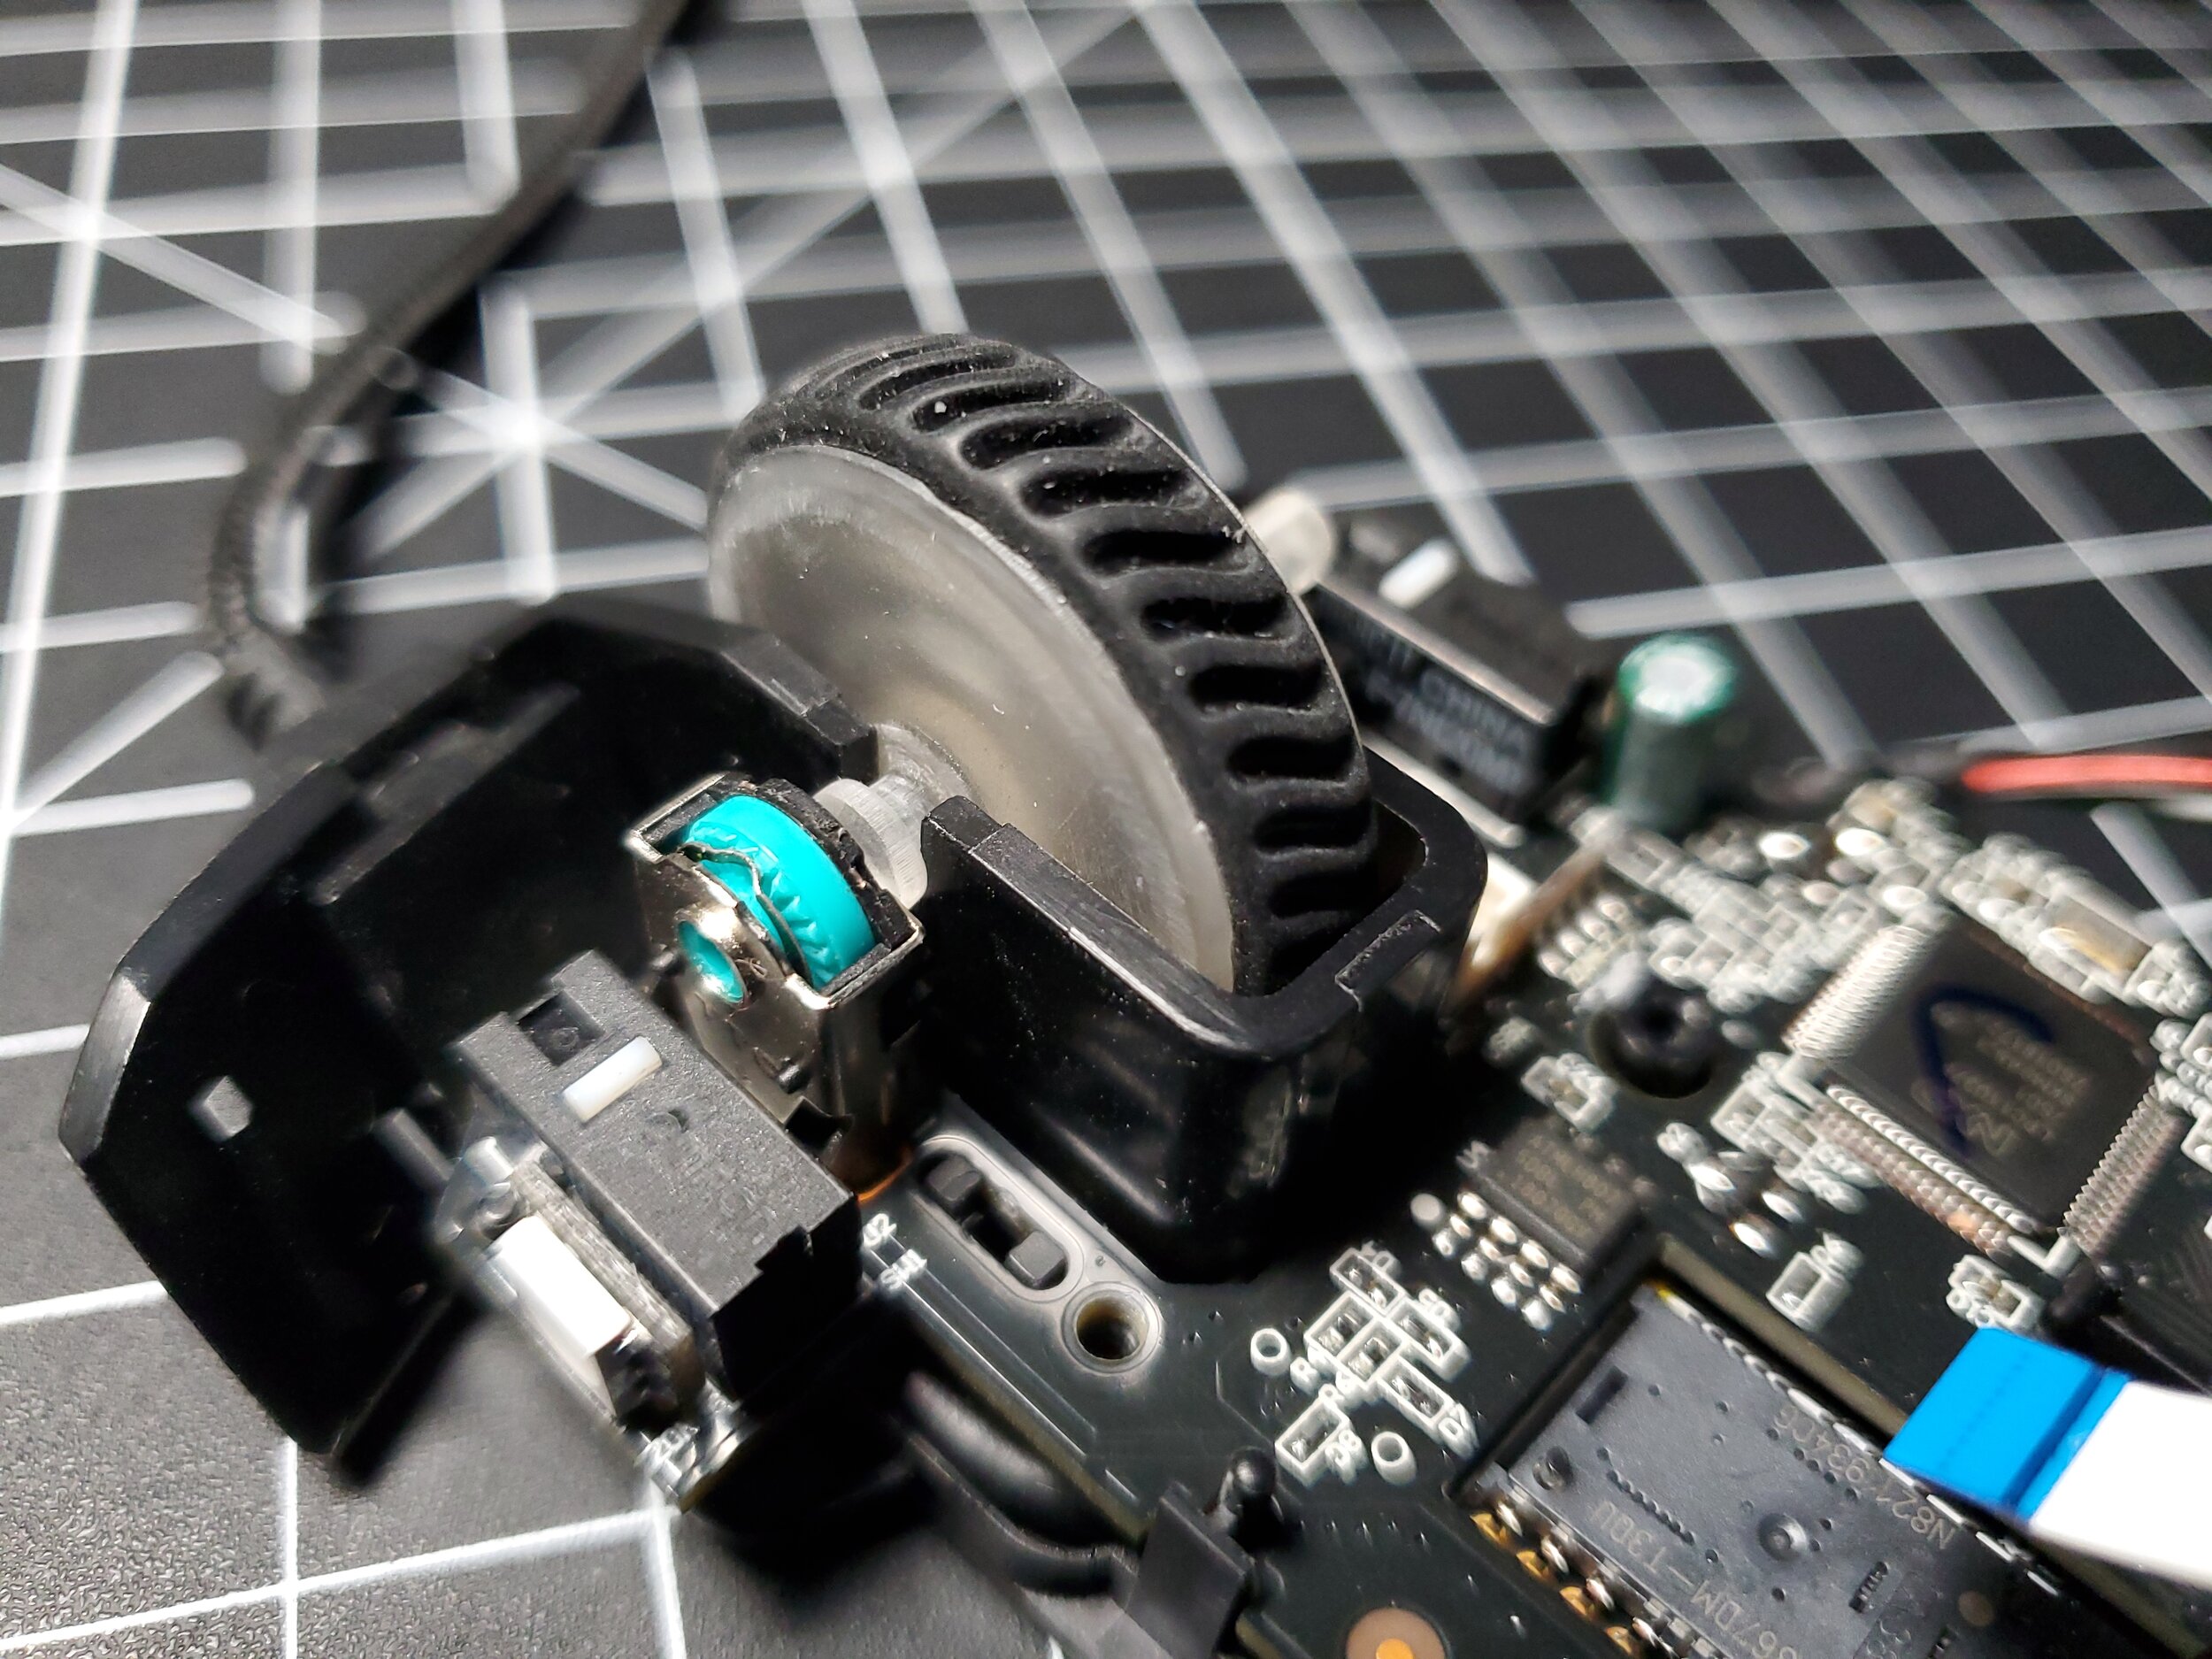
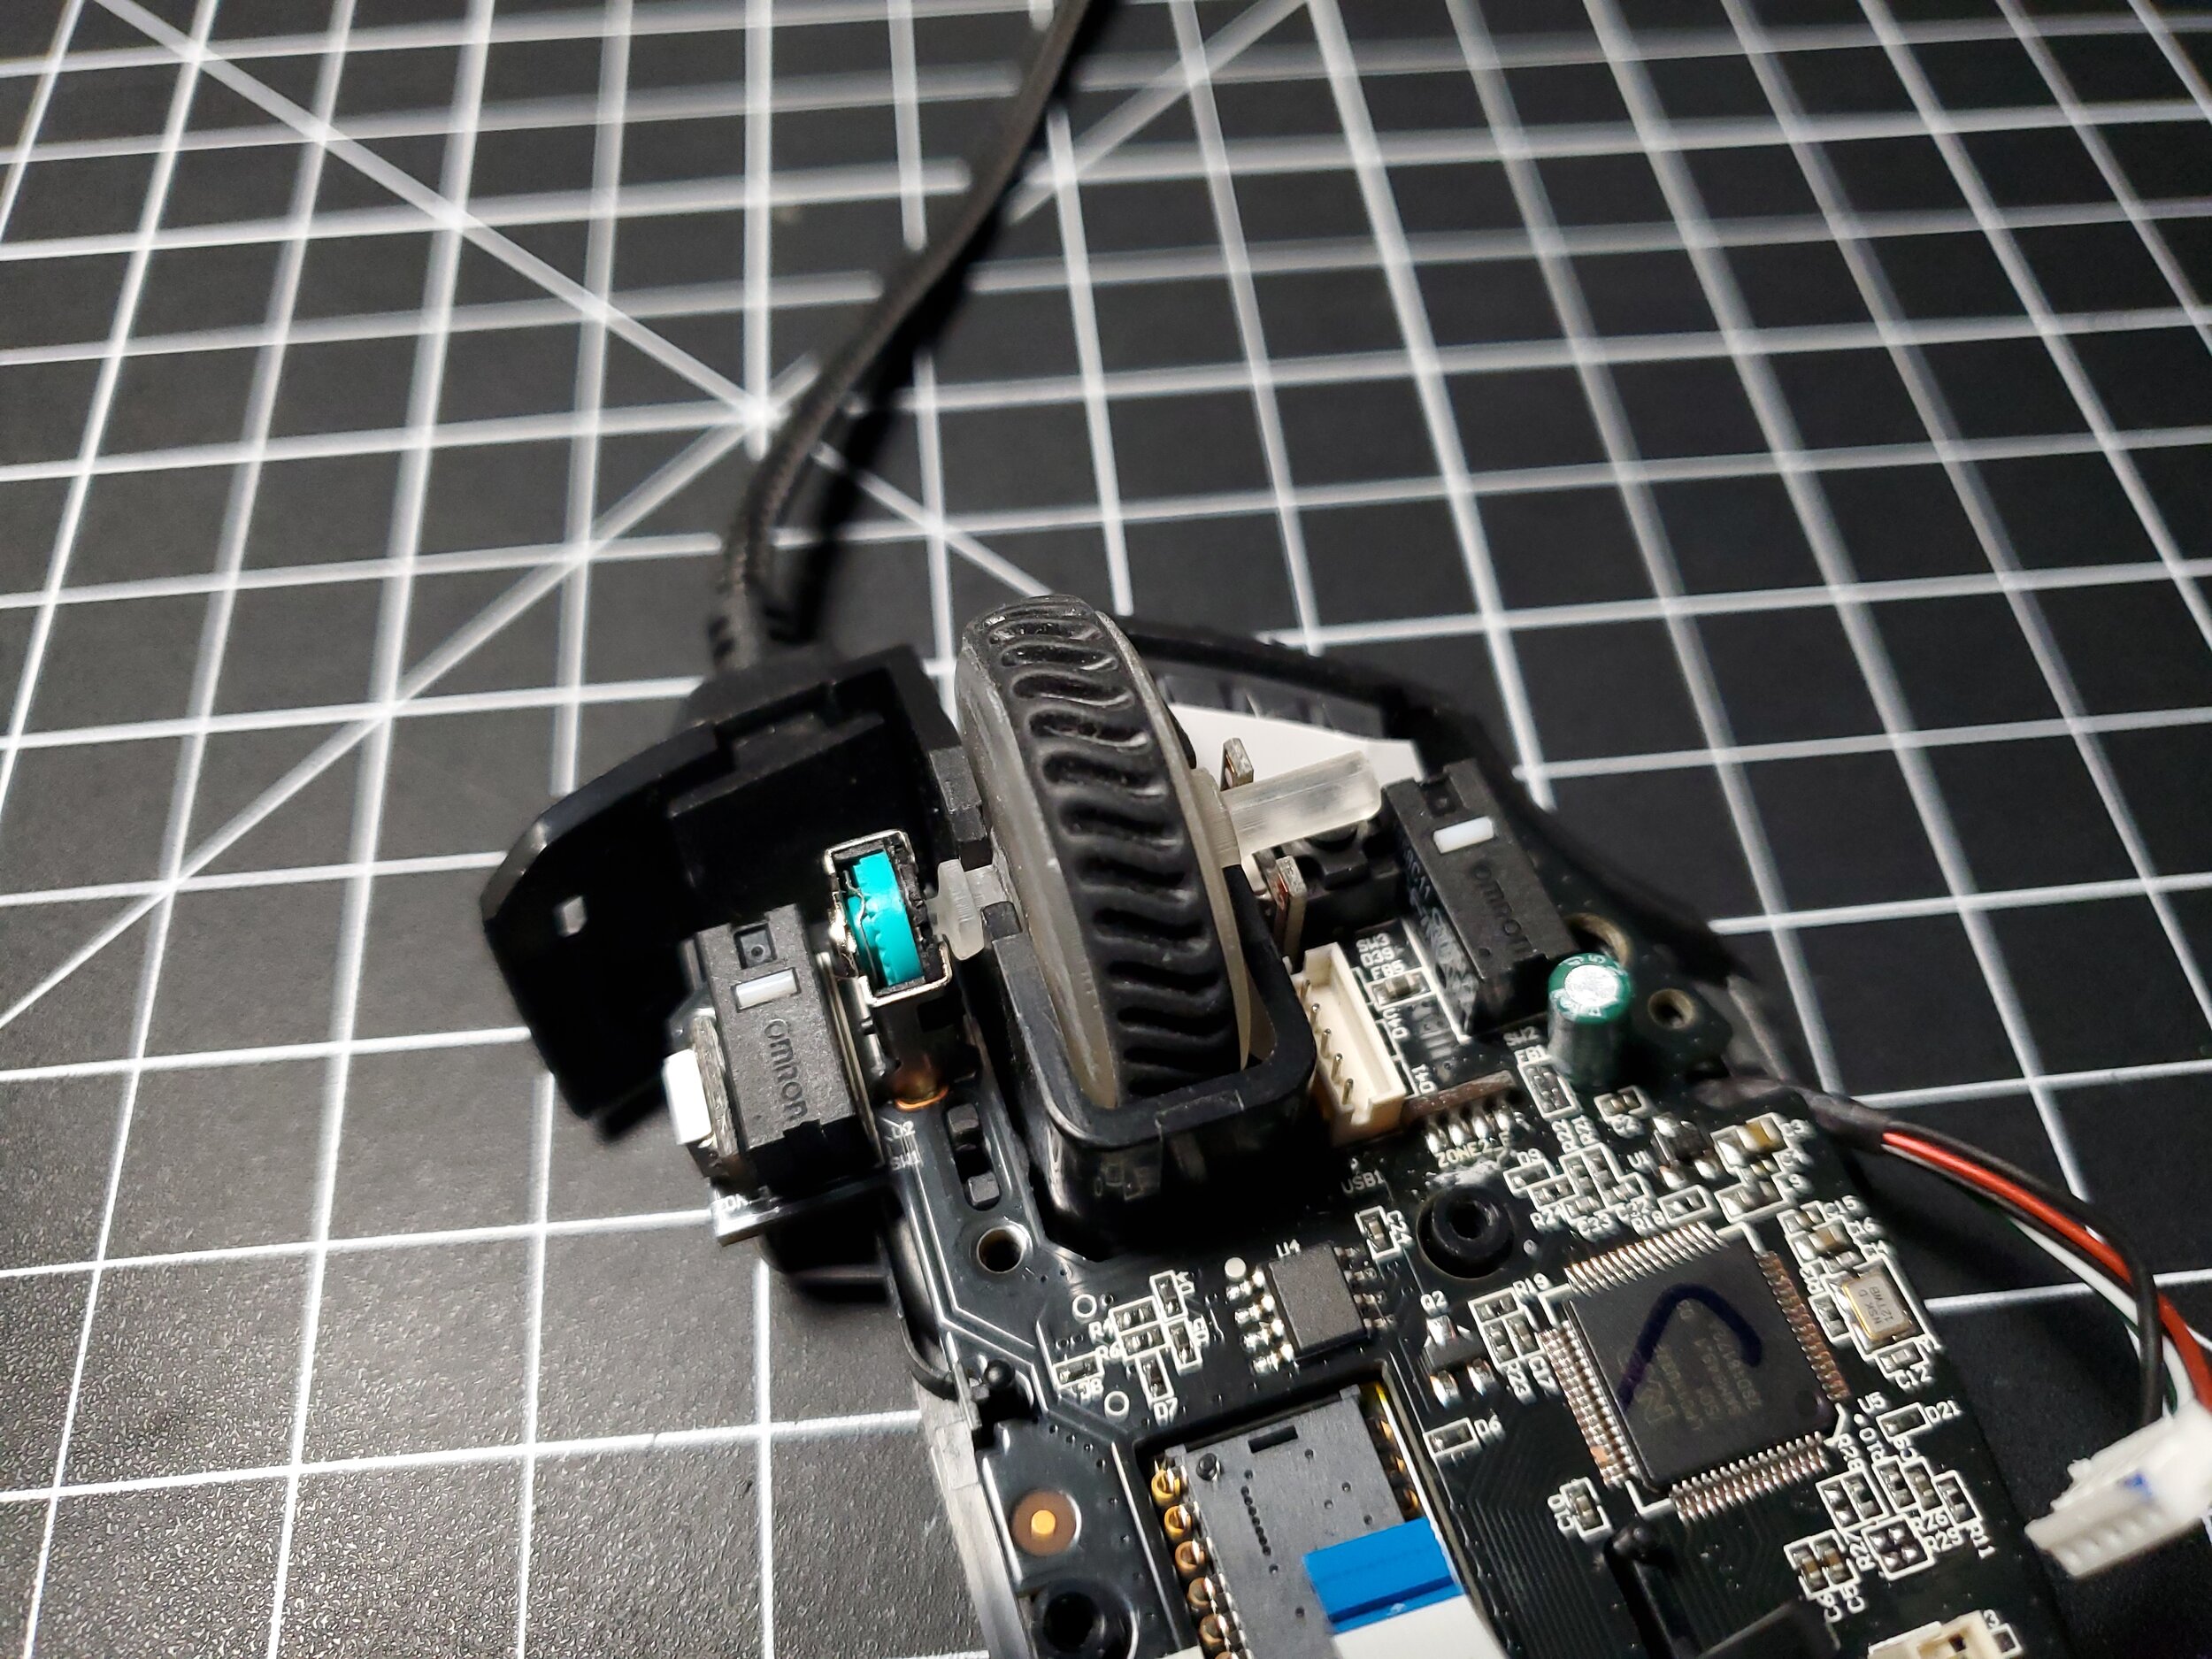
Be warned: intermediate soldering skill is required for if you’re repalcing the wheel encoder, and the PCB is narrow around the slot just below the encoder (you can see this in a few of my pictures below), so don’t apply too much pressure while de-soldering the broken encoder, else you might crack the PCB! It may make your life easier to (carefully) snip the two soldered mounting tabs on the dead encoder with side cutters before de-soldering it, so that it’s only held down by the three pins. Then you’ll be able to grab onto the two tabs with tweezers and de-solder them more easily after the encoder body is removed. Also, use plenty of flux and solder wick when de-soldering (as one always should).
Original article:
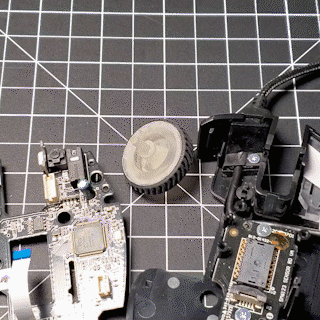
Quite some time ago the scroll wheel shaft snapped on my Corsair Scimitar Pro RGB, letting the scroll wheel free spin without doing anything on the screen. At the time, I had no way of fixing it as I wasn't able to find a replacement wheel; this 5 cent part had rendered my 80$ mouse useless. If only our right to repair were taken seriously by lawmakers and electronics manufacturers…
Without any other recourse, I bought a whole new mouse as replacement. Actually, I took the opportunity to upgrade to the Scimitar Elite, which sadly uses the exact same scroll wheel part. The weak scroll wheel shaft is a known issue, and in the past Corsair has simply told users to send their mice in under warranty (if they can…) to be replaced. It seems all of the Scimitar series of mice, as well as perhaps some other Corsair mice utilize this same flawed scroll wheel design.
Nevertheless, I kept the original mouse in hopes of fixing it one day. Now that I have a working SLA printer that day has finally arrived.
As of writing, Corsair hasn’t done anything to address this issue, which is quite a shame, nor have I been able to find replacement wheels that match this one.


My first task was to reverse engineer the original mouse wheel, modeling it as precisely as possible in CAD. I must admit—and I suspect this is a result of the original scroll wheel part being injection molded—the part dimensions were difficult. Normally when you're modeling a part in CAD, you can tell what dimensions and measurement system the designers used with a little bit of intuition. Measure something that's 0.127in with your caliper? Chances are the designer was using fractional inches when designing the part; 0.125 is an eighth of an inch. Likewise, if you measure 5.04mm chances are that dimension is actually just 5mm. After all, we engineers are still mere humans, and humans like to use neat, round numbers.
That doesn't seem to be the case with this scroll wheel; the numbers were all over the place. At least I was able to determine the original part was most likely designed using metric units.
Since most of the dimensions didn't work out to clean round numbers in metric or inch units, I more or less had to guess at the dimensions. Normally I'm not comfortable doing this because it inventibly leads to doing more iterations and test parts before arriving at the correct part dimensions and tolerances.


My first print was just the shaft itself, primarily to determine if my printer would be capable of reproducing the 1.5mm hex section of the shaft that engages with the scroll wheel encoder within the mouse. This is what broke on the original scroll wheel. If the printer could handle that, I would know the project is still a go.
And as you can see from the video above, it certainly did well enough.


Next I sliced and printed the whole scroll wheel, and as expected, the dimensions didn't turn out great.
With a lot of carving and wet sanding, it did fit, but several areas were a bit over-sized. Back to CAD to do some tweaking…


With the refined part sliced, printed, and post-processed, I tried installing the scroll wheel and it looked alright. I did need to do a bit of carving with an x-acto knife to clean up some rough edges, but nowhere near as much as the first test print required. I suspect all of that was a result of some poorly placed supports on my part…

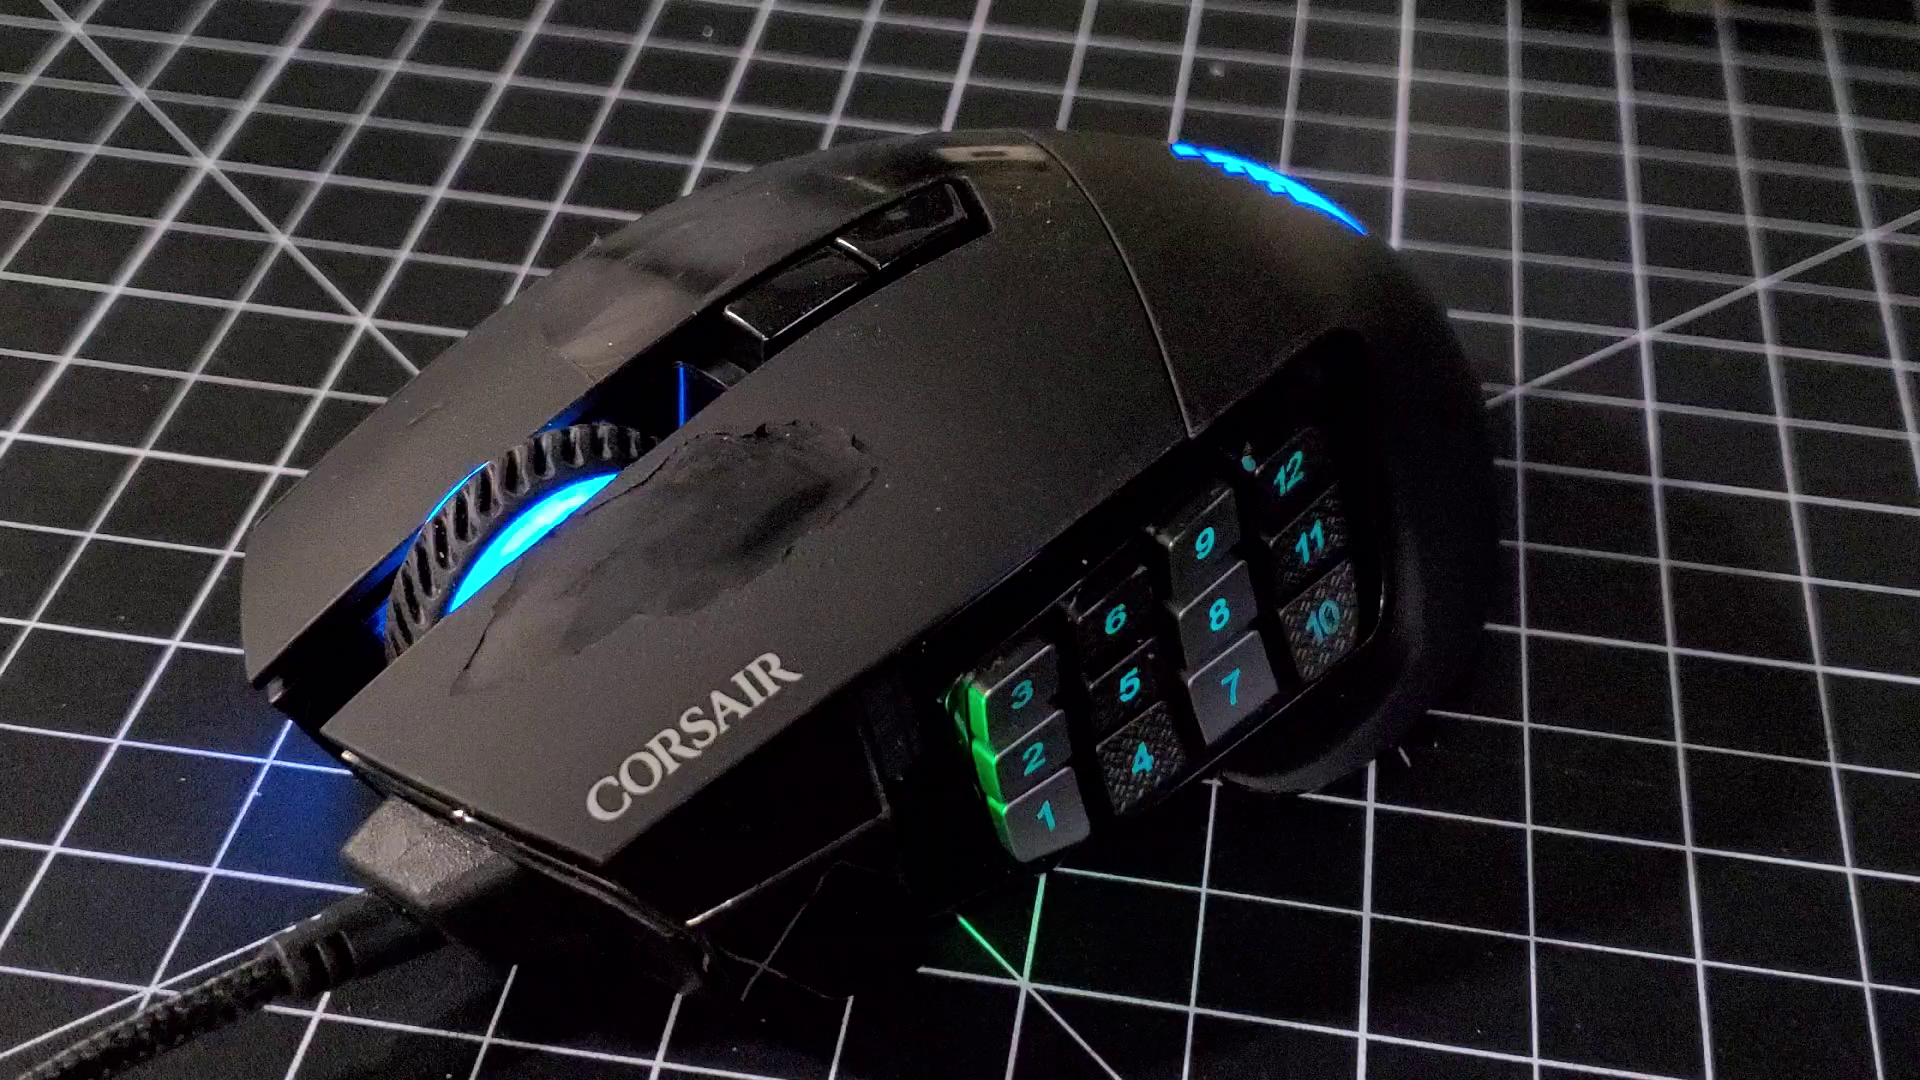
(Yes, I know how bad the peeling paint looks; that stupid soft touch coating stuff does not age well on any product)
With the new wheel tested and rolling smoothly, I put the mouse back together, and with fingers crossed, plugged it in. Each RGB zone happily came to life and I, eagerly mouseing over to the first window I could find with a scroll bar, tried the new wheel. I won't lie; it’s not as smooth as the original wheel. But it's certainly usable. This mouse will live to point another day.
Downloads and Print Instructions
I’ve published the STL files for this wheel on Printables here and MyMiniFactory here for anyone who happens to have a broken scimitar and an SLA printer. The files are not pre-supported, so you'll need to figure out how to best orient and support the part on your specific printer.
I recommend using a clear or somewhat translucent white resin so that the scroll wheel RGB region will still work. And be careful not to cure too long or your clear resin might turn yellow, tarnishing the Scimitar's RGB beauty.
Depending on your printer and the resin you use, you may need to do some light trimming (carving blades, x-acto, etc) and or sanding (wet sand only!) to get the wheel to fit into the assembly and roll smoothly. Make sure to do all post-processing before curing the part!
There are a lot of fine details on this print; I do not recommend attempting it on an FDM printer!